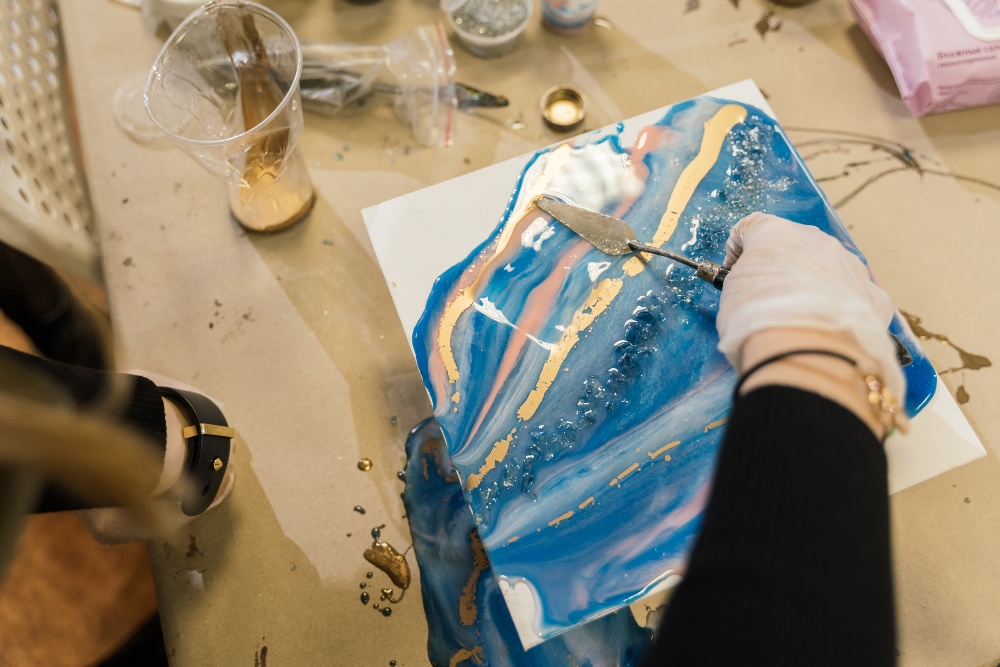
Creating your own resin artwork requires an eye for art and a little flexibility when it comes to your budget. This can result in museum-worthy, high-quality pieces that can come in the form of wall art, table ornaments, jewelry, or coasters, among many other types. Resin art requires any creator to have an understanding of how the process works in order to ensure that the artist is fully knowledgeable about safety procedures as well as the rudiments which are the foundation of this craft. Consider these five tips to help you get started on resin art:
Choose Essential Tools
The first step to getting started on resin art is to assemble a toolkit. This should include all the equipment, supplies, and protective gear you'll need to create your artwork. Such items, however, would depend on the type of resin art you make. The items every beginner should have include:
- Clear non-toxic epoxy resin
- Protective gloves
- Heat gun or butane torch
- Respirator mask
- Stirring or popsicle stick
- Old clothes or aprons
- Plastic cups
- Plastic measuring cup
- Toothpicks
- Drop sheet
These items can be easily found at craft and art supply stores such as https://www.justresin.com.au/. If you can't find an exact tool, you can supplement it with something that's as close to the real thing as possible. Using the right tools will better assist you in achieving the art creation you want.
Choose the Right Art Surface
After collecting the tools you need, you can move onto choosing the surface you'll be working on. If you're creating paintings and pourings, then you'll mainly need to use hard surfaces such as wood, metal boards, canvases, tiles, glass, and concrete. These materials can also be used to make furniture or décor pieces for your home. A canvas board is the most inexpensive option. Starting with small 6x12 boards, you have enough space to test your mixes before you begin. If you have more money to spend, you can opt for wooden panels which will make painting easier thanks to their sturdy structure.
Mix Colors and Dyes
Of course, the majority of artwork would not be complete without adding colors which allow you to bring your visions to life. For a more DIY approach, you can use dyes such as food coloring, acrylic paint, spray paint, ink, or even eyeshadow if you want to save money on supplies. Otherwise, you can purchase resin color pigments specifically made for this craft which can come as bottled liquids for easier application or as powders such as mica and other resin-specific powdered pigments. Just be careful when handling dyes, inks, and other types of coloring so that they don't get onto your clothing, which is why old clothing or aprons are needed. The colors and dyes are added in the stage where resin is being mixed with the hardening agent, so you'll need gloves to prevent staining your hands.
Incorporate Decorations
One of the main components for creating resin art is the extra decorative pieces that you can add to embellish it. These are known as inclusions, and these aren't a necessity to get started on resin art. However, they can make a beautiful difference if you want to add sparkly and glittery elements to your artwork. Small objects tend to work best when creating mixes because they'll fit into your mold cast and you can use as many as the space allows. These objects can be beads, stones, crystal fragments, geodes, and the ever-popular glitter. In the case of glitter, you can use it as an alternative to coloring such that you can leave your resin clear and add colorful glitter as your pigment to let it shine on its own.
Ensure Safety and Precaution
Resin art is created by mixing resin with a hardener to produce a chemical reaction. Therefore, you should take the necessary precautions when handling chemicals which should begin with treating your workshop or station. Make sure to wear protective gear such as a respirator and gloves, and do your work in a well-ventilated area or outdoors to prevent inhaling fumes, and avoid direct contact with your clothing and skin. As for your artwork, you'll want to protect it from dust which can be done by adding a dust cover while your painting cures. In terms of heat, a key tip is to release heat from your torch in quick bursts at least 5 inches from your artwork to prevent it from boiling and creating large air bubbles and clumps. Be sure to keep the temperature as cool as possible to avoid overheating the resin.
The key tips to get you started on resin art encompass getting the correct tools and knowing how to use them the proper way in order to keep both you and your art safe from the elements. In the end, the best advice to follow is to try it out for yourself once you've gathered and met the necessary requirements. From there, you can make adjustments along the way which is the most ideal way that a burgeoning resin artist can learn and eventually hone the craft.
EDITORIAL POLICY
The Flash List is dedicated to providing trustworthy editorial content by maintaining strict ethical standards, journalistic integrity, and credible professionalism regardless of any remuneration as working media. The Flash List is not affiliated with third-party companies mentioned and makes no endorsement or guarantee expressed or implied. The preceding article, which contains affiliated link(s) for which compensation was received, is intended for informational reference only and does not constitute advice of any kind. Moreover, a qualified professional should be consulted regarding any lifestyle consideration, medical treatment, or monetary transaction, etc. Content is published in accordance with USFTC regulations and terms and conditions.
MORE ON THE FLASH LIST


